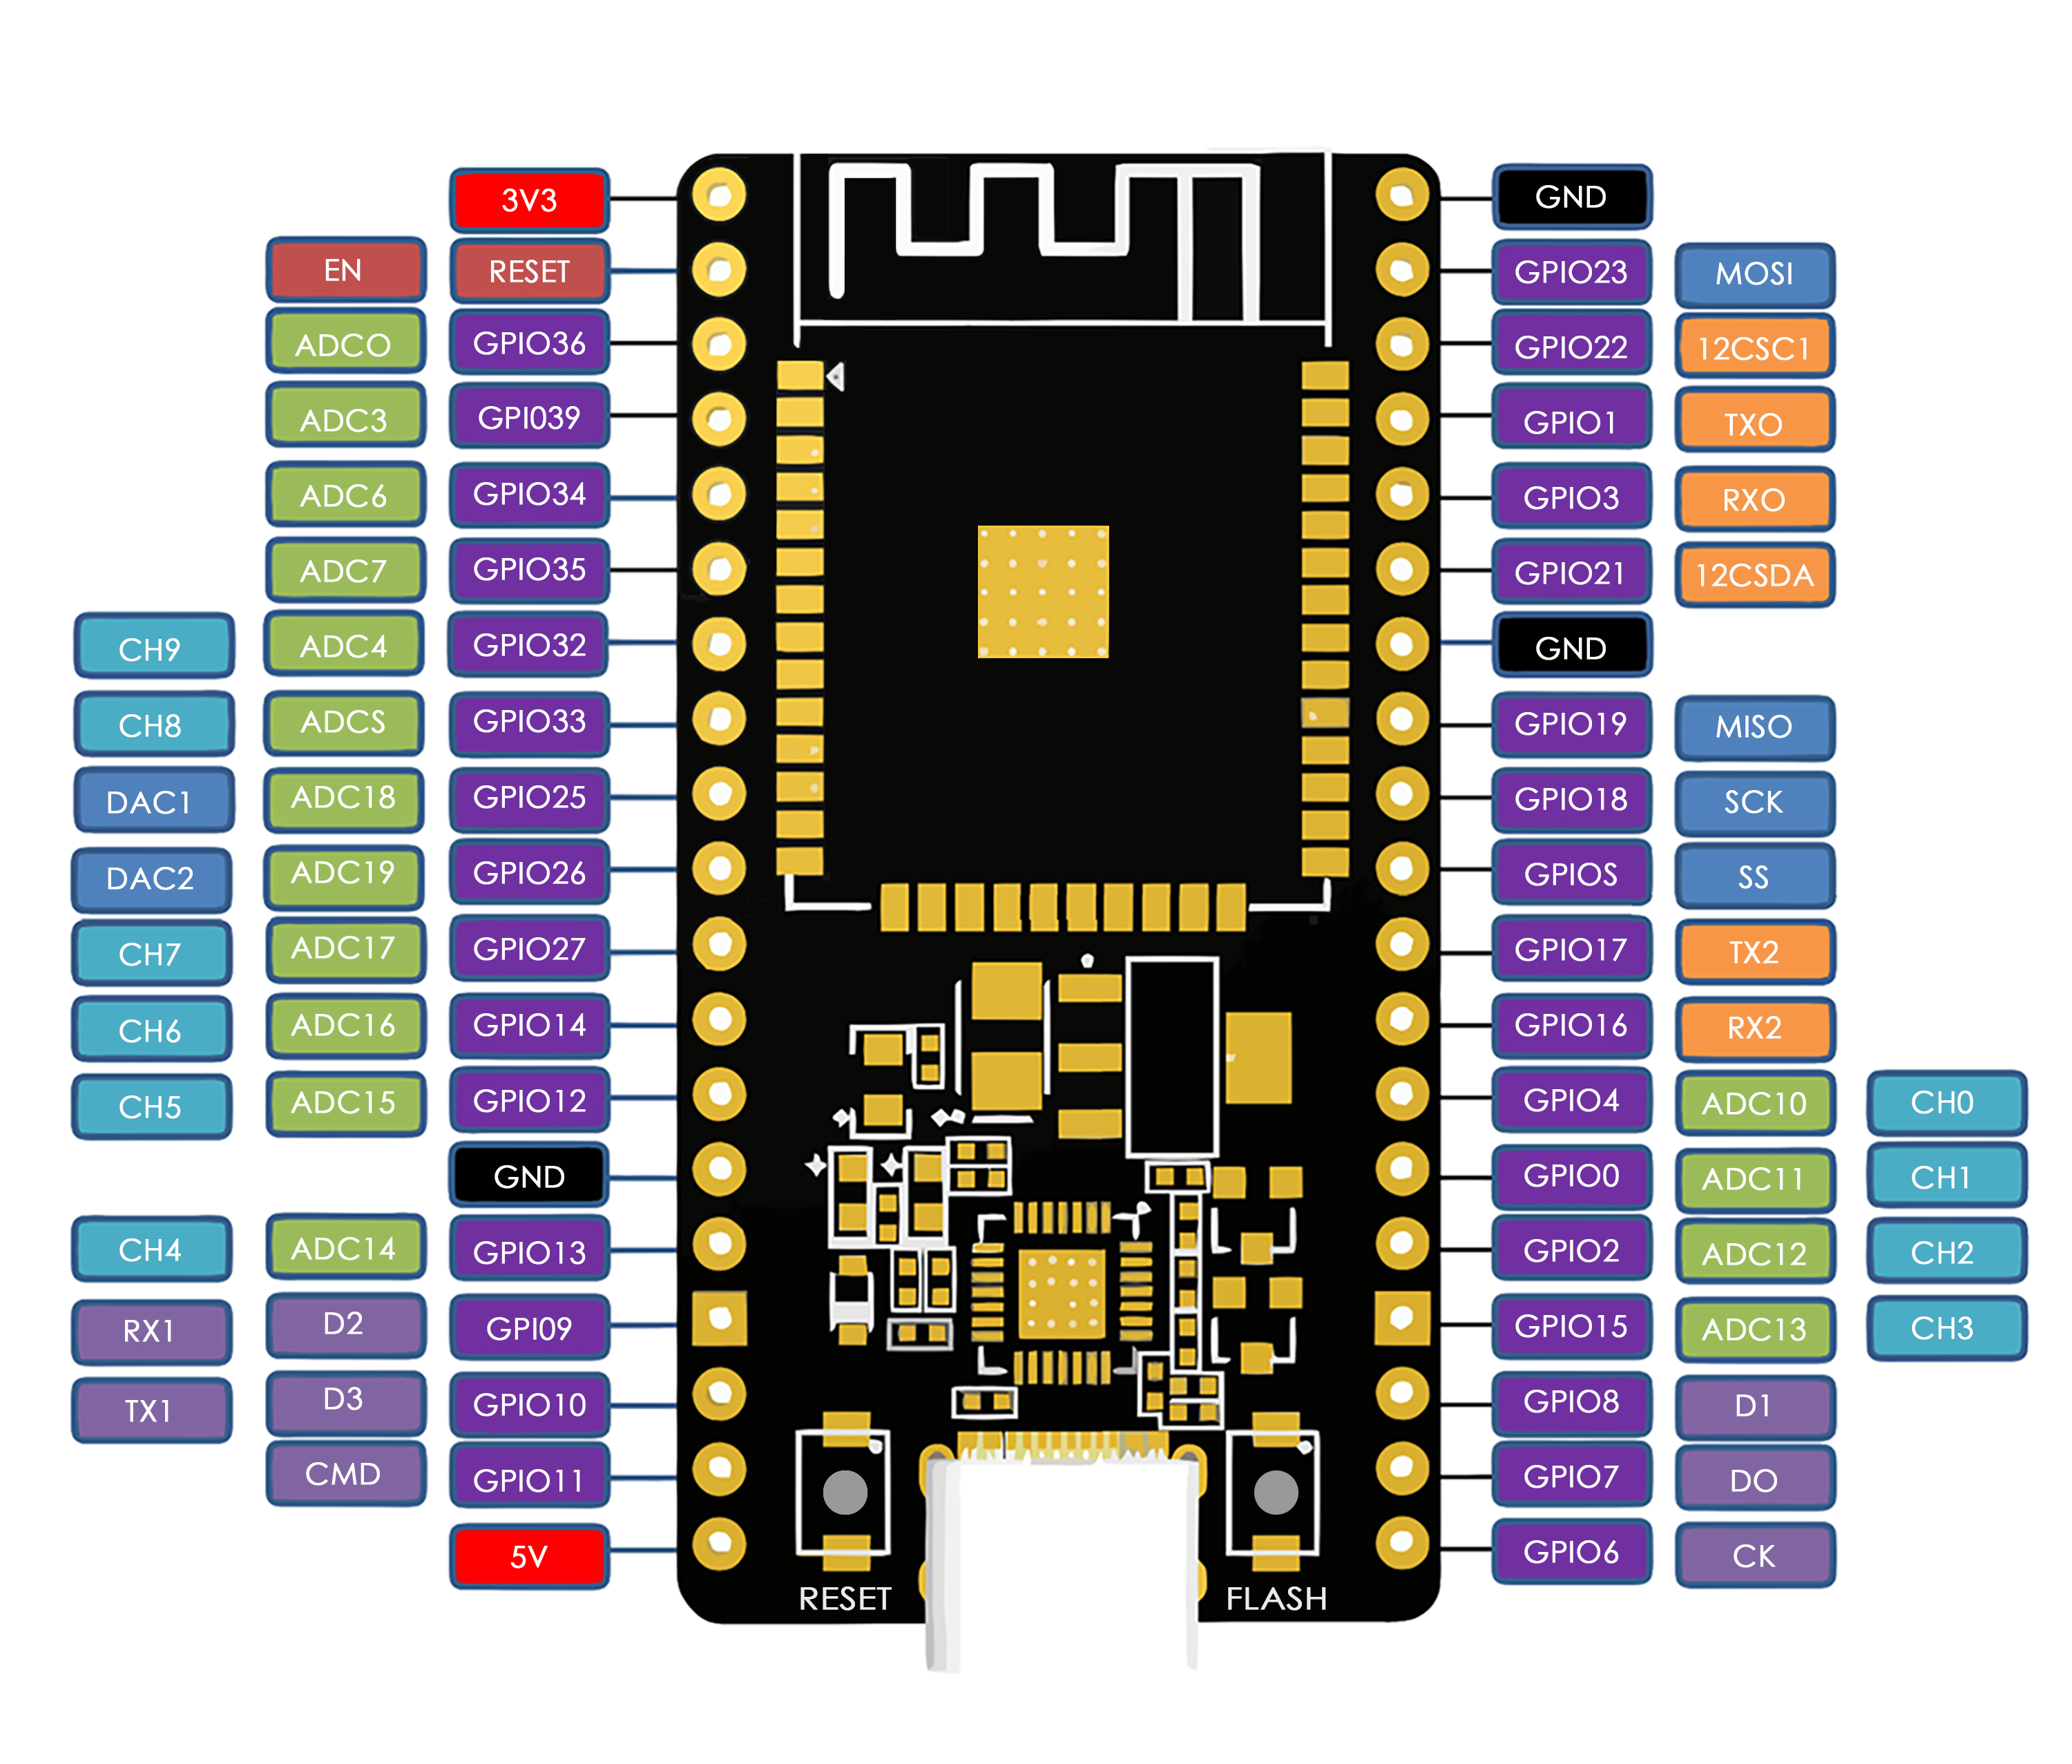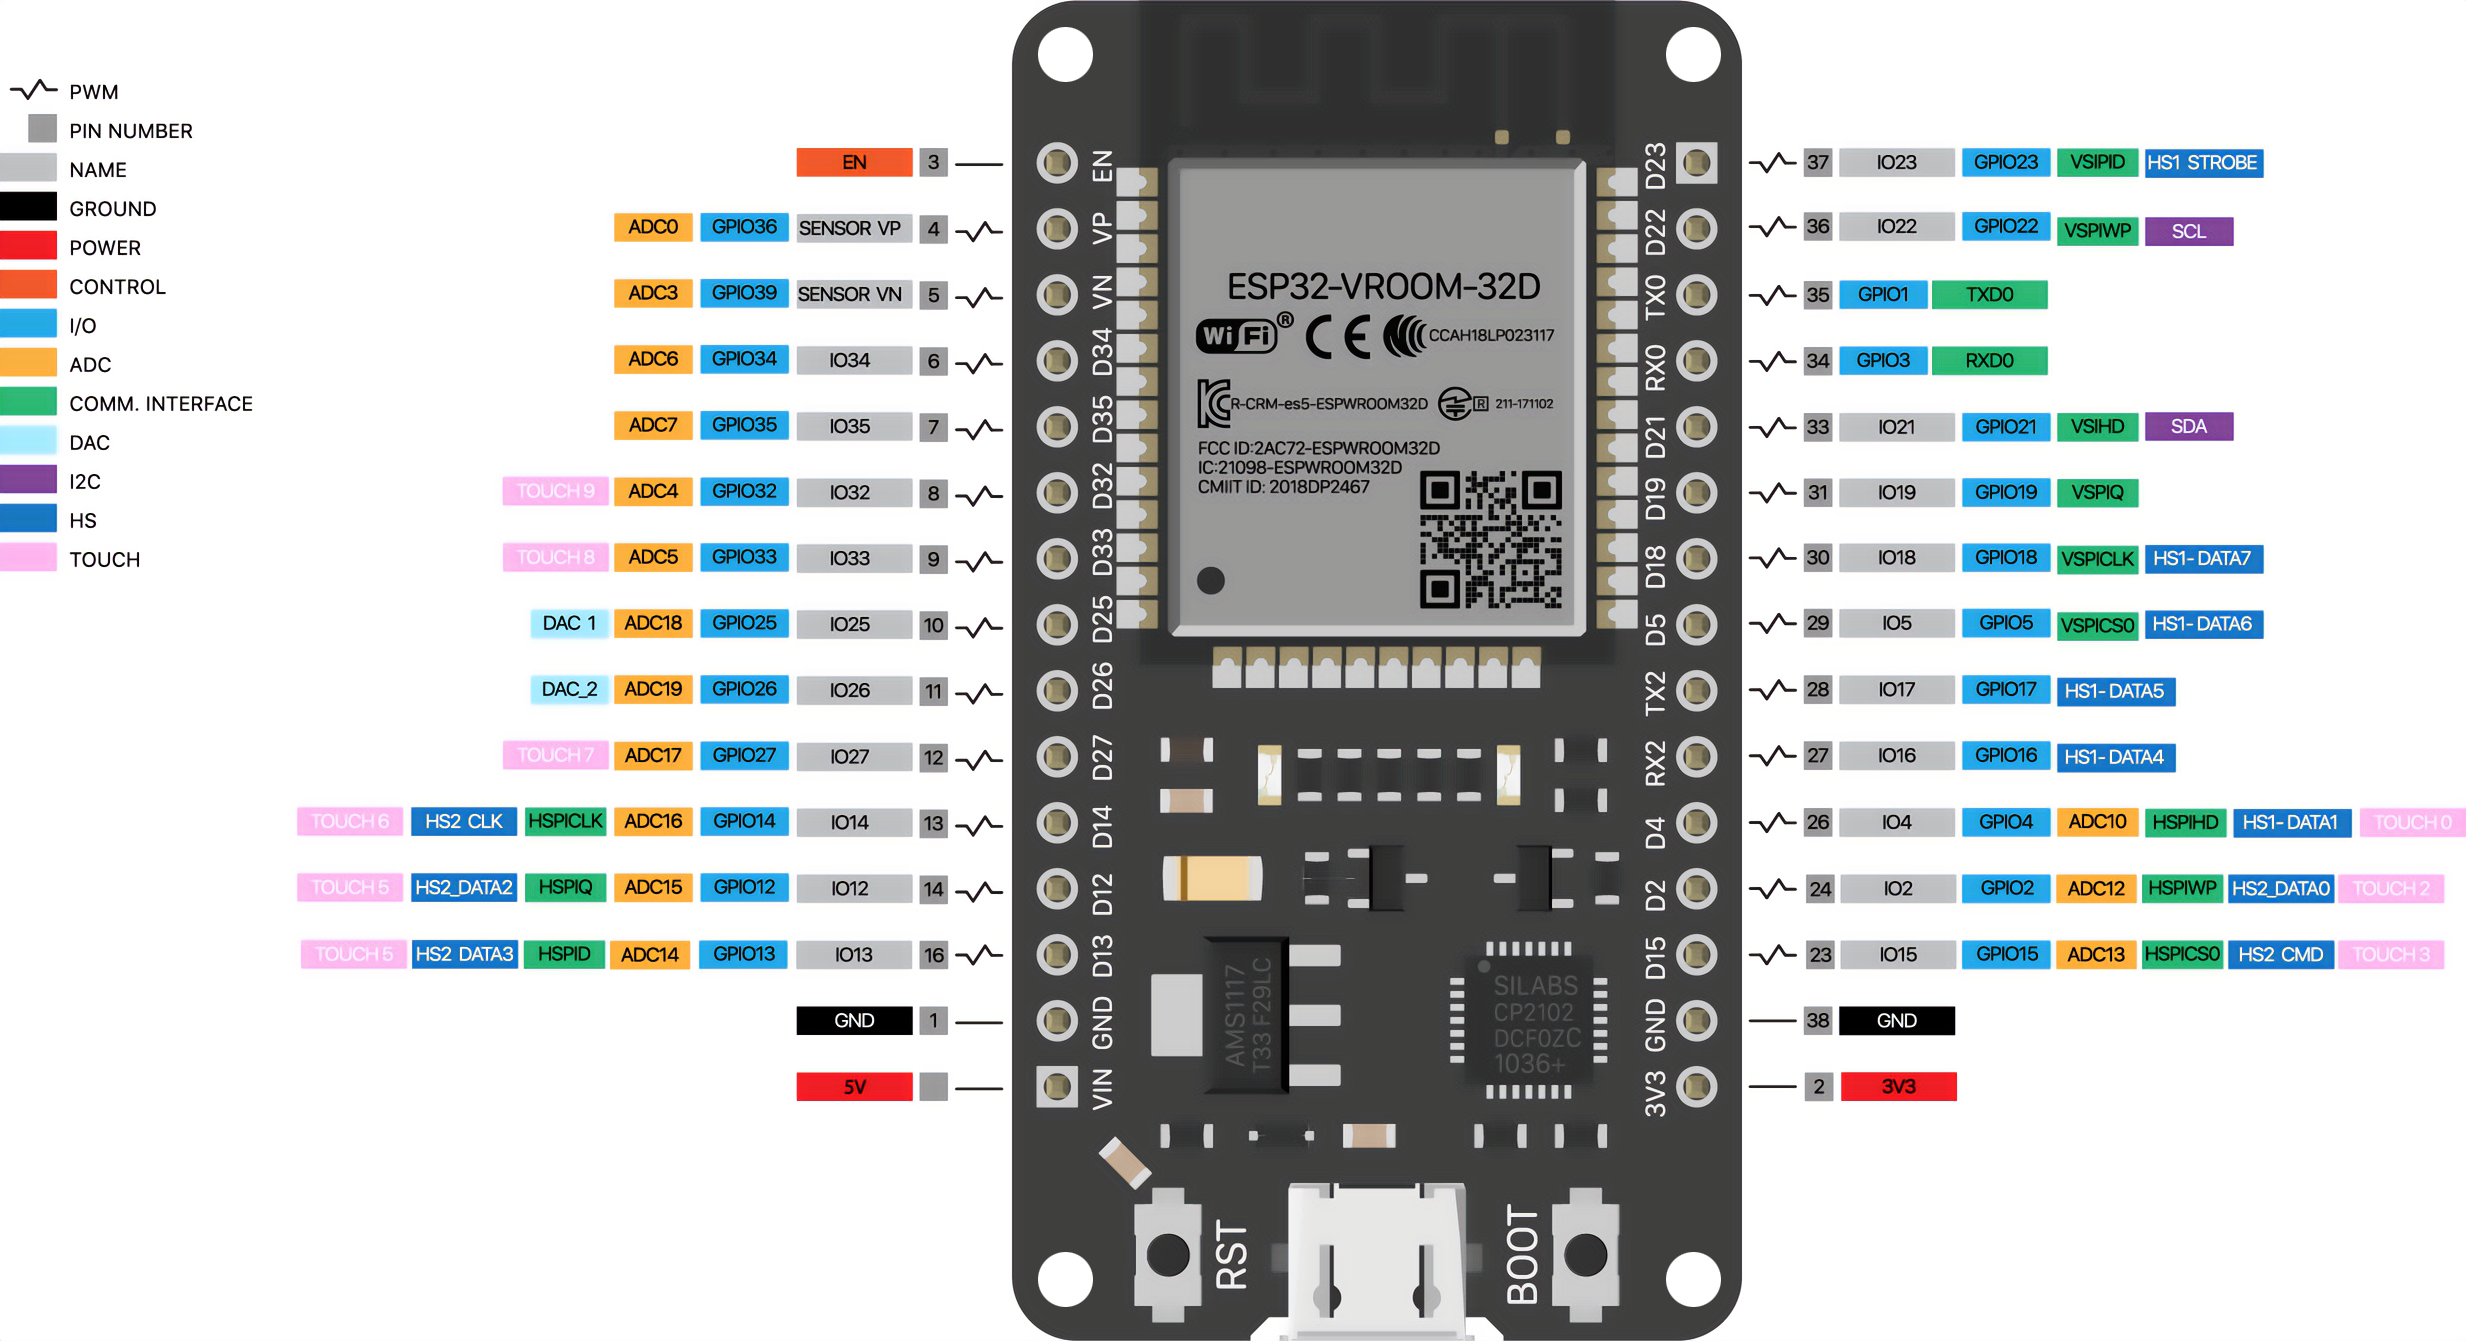
NodeMCU is a mature ESP32 development architecture that is increasingly being used in IoT development due to its built-in Wi-Fi and Bluetooth capabilities, as well as its enhanced computing power. Below, we'll explore how to connect an ESP32 NodeMCU development board using the Arduino IDE.
How to Setup the Board
Step 1: Install Drivers on Your Computer
Usually, new devices automatically install their drivers upon first connection. However, in some cases, such as with the Silicon CP2102 USB Bridge, the operating system may fail to recognize the device. Navigate to "Ports (COM and LPT)" or "Other devices" in the Device Manager. If you see an exclamation mark before "CP2102 USB to UART Bridge Controller," it indicates driver installation failure, requiring manual intervention.
You can download CP2102 drivers from the official website: https://www.silabs.com/developers/usb-to-uart-bridge-vcp-drivers?tab=downloads.
Step 2: Add Board Manager URL
To program other microcontrollers using the Arduino IDE, you need to install the corresponding board manager containing the necessary development board. Obtain the URL for the respective board manager. For NodeMCU ESP32, simply use the official resources provided by ESP32:
https://dl.espressif.com/dl/package_esp32_index.jsonNavigate to "File > Preferences" in the Arduino software. In the "Additional board manager URL" text box, enter the URL for the board manager (separate multiple URLs with commas).
Step 3: Install the Manager
Click on the second icon in the left navigation bar of the main window to open the "Board Manager" window. In the search bar, type "esp32," then select "esp32 by Espressif Systems" from the search results list and click the "INSTALL" button.
Step 4: Select Configuration
After installing the management package, the microcontroller should appear in the list of available board types. For the NodeMCU ESP32 development board, you can select the "ESP-WROOM-32S Development Module."